Classwallet How-To

Classwallet
How-To Guides

Direct Pay

User guide to direct pay. This should work and look the same on most phones, but the screenshots are of an iPhone.

Reimbursement (For Smartphones)

This is a user guide to smartphone reimbursement submissions. It should work on most phones, but these screenshots were taken on an iPhone.

Reimbursement (For Computers)

This is a user guide to computer reimbursement submissions. This is PC, but should look the same for Mac.


Get Invoice First

The first part of this process happens before you enter into Class Wallet. You need to obtain an invoice from the vendor for the service or product you are wanting to purchase. This part varies by vendor. Contact them if you are not certain. Some you checkout on their website and select to pay with EFA funding and then they email an invoice to upload. Some you fill the cart and screenshot it and email it to them for a proper invoice. For services you simply ask for the service invoice to upload. Once you have obtained your invoice you are ready to follow the steps below.

How to use direct pay on your cell phone. Step by Step.

1. When you go to class wallet on your phone the first thing you see is the login page. Here, put in your information and prove you are not a robot.

2. Next it will throw up a notice you can click I Understand keep going.

3. Now scroll down the page to where you see Direct Pay – Pay for services and click where it says PAY there on the button.

4. Another reminder pops up. Click the I understand button and keep going.

5. Now it wants to know who you want to pay. Type in the vendors name and once you see your vendor come up click the vendor.

6. Next it will ask the amount to pay.

7. Type in the amount from your invoice. Then click next. Always click next to move on.

8. Put that invoice here. If you saved it as a photo or saved the file in your files. Navigate to the invoice and upload it at this stage.

9. Now look at the lovely little invoice sitting like it should. Double check it. Did you upload the correct one? Make sure.

10. Now click NEXT once again and keep this party flowing.

11. Now here you make your purse selection. Choose the 24-25 EFA or as we get into this there will later be 25-26 EFA. Choose your purse then look at the categories. Be certain to choose the category that best suits what you are buying so that the right team members review it quickly. And so they are able to sort funding categories correctly.

12. See here the category was testing. This was the invoice for our MAPS testing.

13. Here you review your information. DO review it. You can click back and fix errors.

You Did It!!

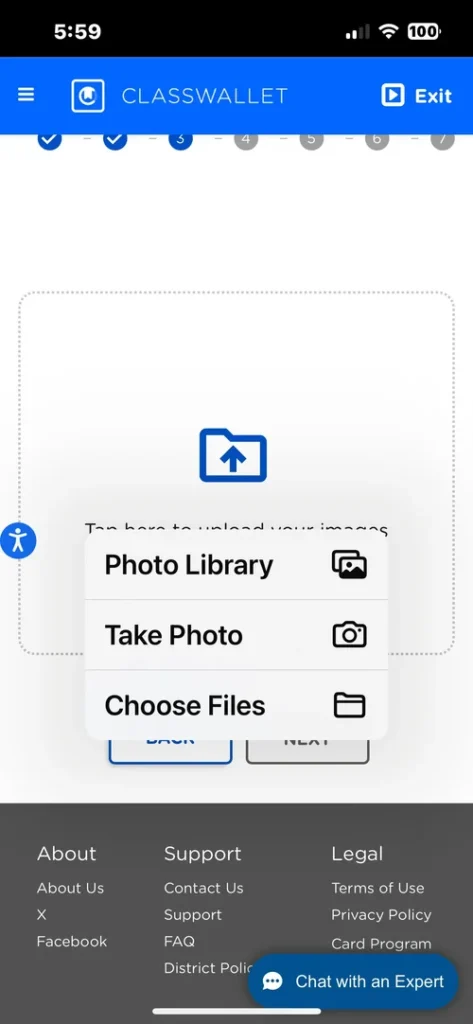
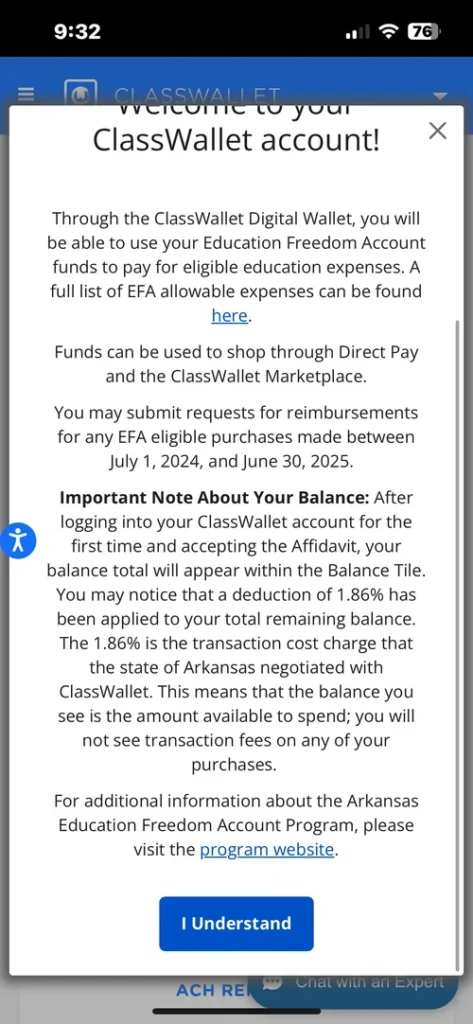
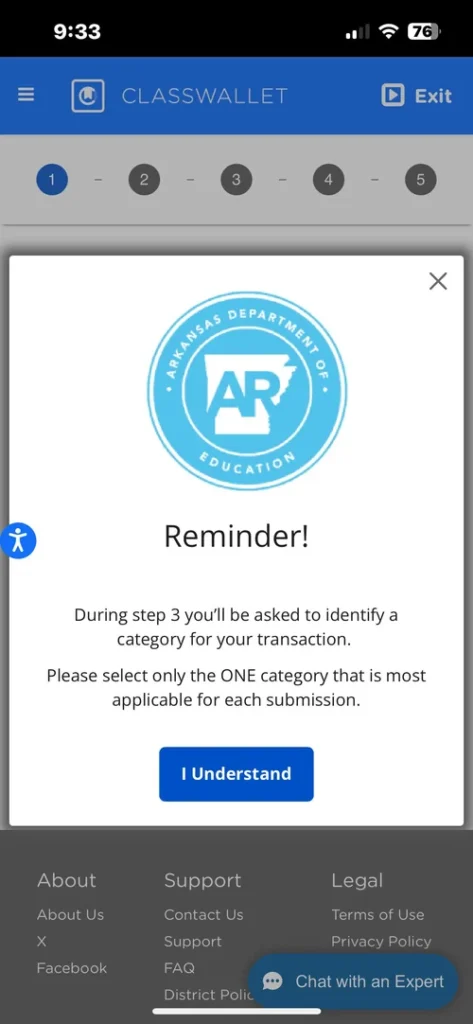
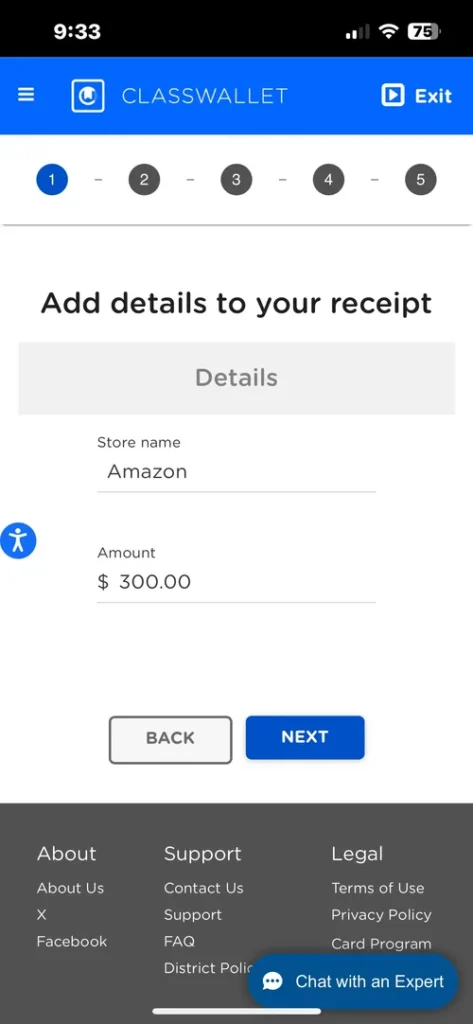
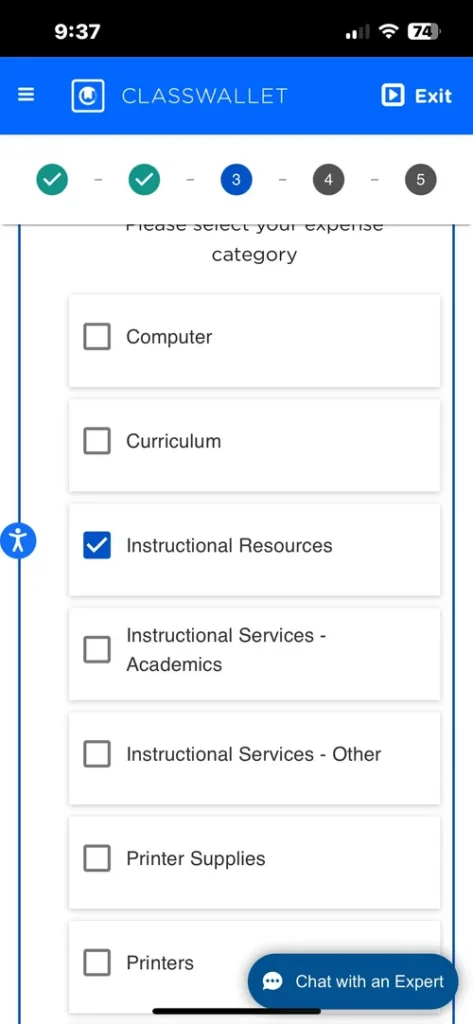
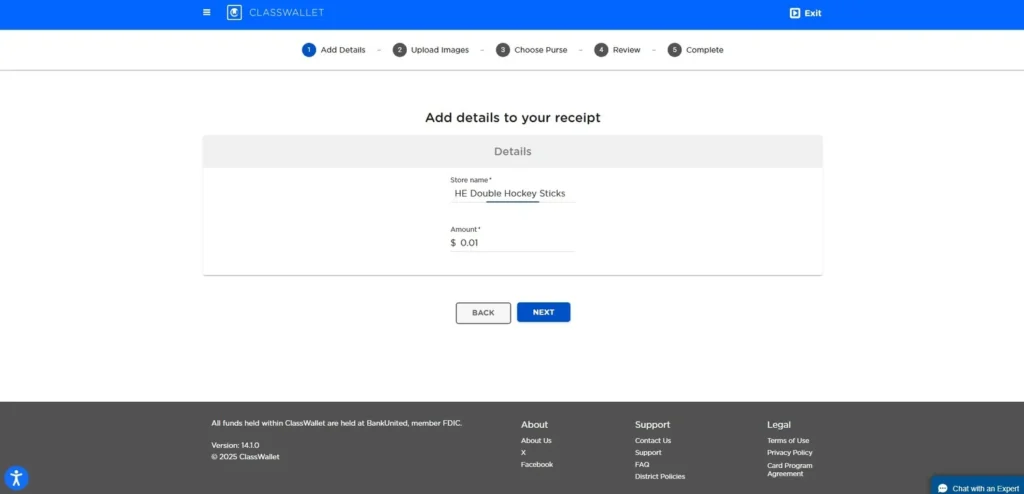
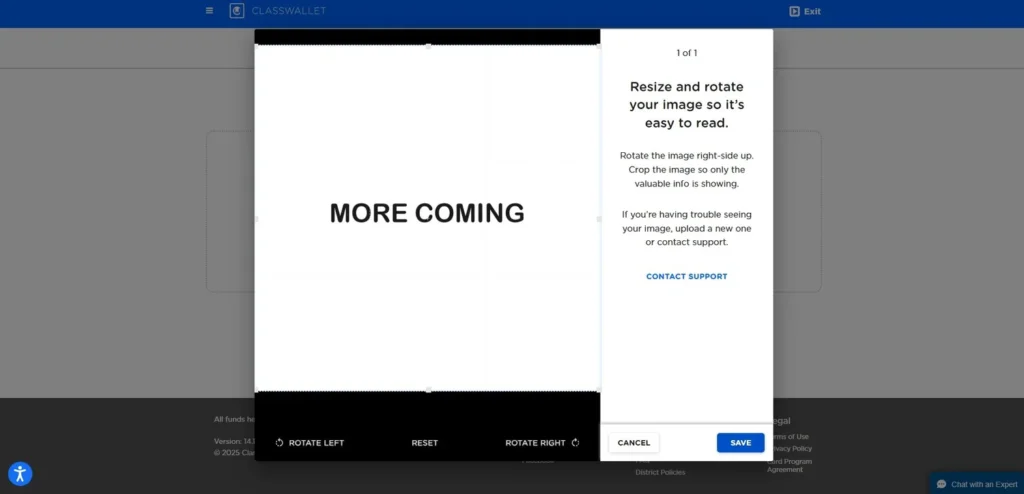
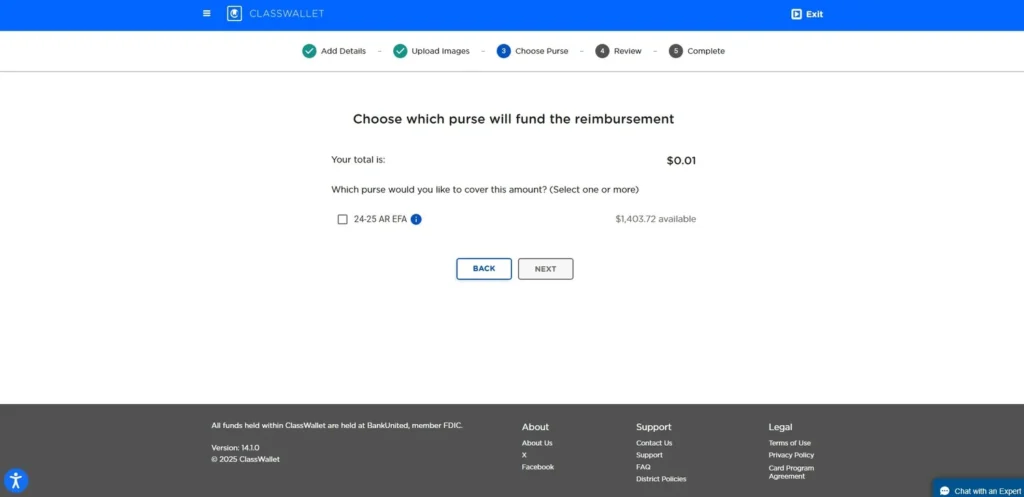
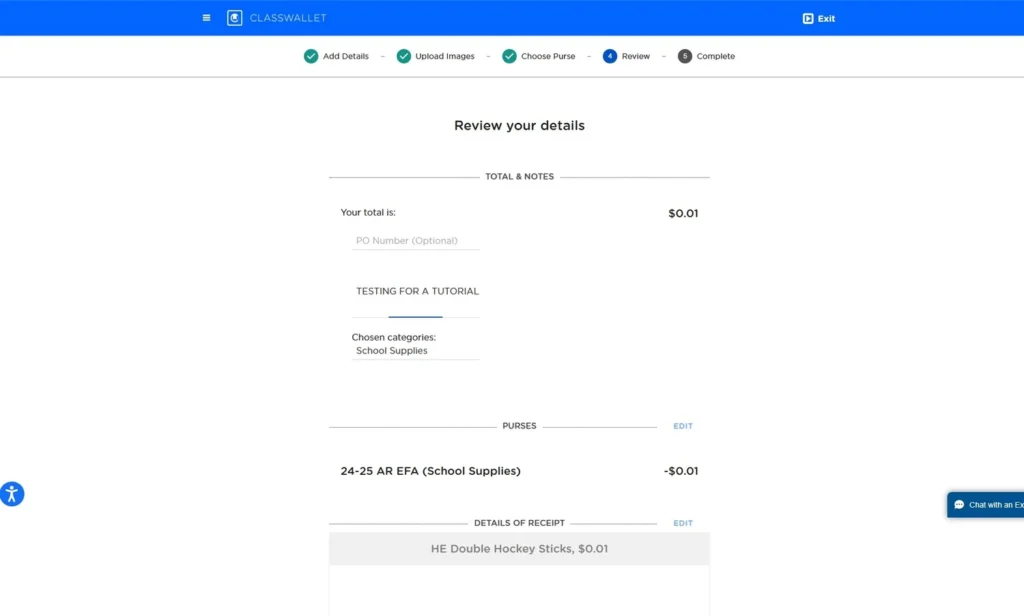
Well, you did your part for now. You need to watch and verify in a few days or weeks, depending on how backed up they are, that you get an approval email showing it has been processed. Then just wait for your items if you were ordering products, or know it’s all set if you were paying for a service.

1. First thing is get logged in! We can’t get much done until then. Put in your information and prove you are not a robot.

2. When this pops up, read through and click I understand.

3. If you have multiple children, make sure you are on the right child’s account. In the upper right up there click the lines.

4. Here you pick the child from the drop-down menu. Just click their name.

5. Once again just click I Understand.

6. After you click on start a new reimbursement (right below your balance on image 3) click I Understand.

7. Now here tell it where you shopped, what you need reimbursed, Just type those in then click NEXT.

8. Now put in your invoice or receipt and any other documentation and choose next again.

9. Right here this next button under your loaded documents here.

10. Click the box by your efa fund so that the menu opens for you to choose the category.

11. Choose the category as closely as possible. If it’s wrong, they have to fix it, and it will slow your reimbursement down. The categories are pretty easy to determine though.

12. Once again choose next…

13, Now overview. Lets check for errors.

14. THIS IS THE LAST NEXT! click it and you are set.

You Did It!!

You’ll get a confirmation email. Now you wait. In a few days or possibly a few weeks during the busy busy times you will get an email that says it was approved or it was not. If approved yay money in 2-3 days. If not read why and correct and resubmit.

Reimbursement looks slightly different on a computer. It’s pretty straight-forward but a few spots do leave some with questions. The screenshots here are for a bogus submission. I don’t have any reimbursements to put in for right now but needed screenshots.


First you come up on the login screen. It is pretty self-explanatory but just in case, put in your email and password, and prove you are not a robot.

When this pops up, read through and click I understand.

We now see this page. The over view of your account. Right there mid left of the page it says START A NEW REIMBURSEMENT.. Let us start by clicking that.

Here, it reminds you to only choose one category. Tell it you understand.

Give your receipt details. Where you shopped, how much you need reimbursed. Then hit NEXT.

Choose browse files and locate your receipt or invoice and upload. it If you have other documents that need to be added get those chosen as well.

Choose browse files and locate your receipt or invoice and upload. it If you have other documents that need to be added get those chosen as well.

Here we see our files have loaded, Check them. Are they clearly uploaded well? Can you read them? If so click that NEXT button.


Here you choose which purse will fund the reimbursement. Now click the little square next to your AR EFA account and hit next.

Once you click it then the menu full of all the category options will open. If your receipt has items that fit more than one category, you must choose which category best encompasses the bulk of the funds. In this request if it’s a computer but you also bought pencils then it’s Computer not supplies.


For this little example, I just picked supplies. It’s getting cancelled moments after completion, so really any would do, but let’s not mess with the system and trigger some wild response to an ordered and cancelled computer. Go ahead and click next after you choose.

Now we are to the summary page. Check it. Is your category right? Your total correct? Scroll on down the page then.

Is your receipt right? IF so lets hit NEXT one more time.


This is the confirmation screen, you’ve made it through!

You Did It!!

You should now receive an email confirming your submission. In 3-10 days on average (slightly longer during super busy rush times) you will get another email. If everything was submitted properly it will let you know it was approved. Class wallet will deposit the funds into your attached account in 2-3 business days.